Sunday, September 2, 2012

100 Cartridge blog hop with My Cricut Craft room!!!!


Hi Crafty Friends! Thanks for stopping by for the My Cricut Craft room September 100 Cartridge hop.  There are some great projects lined up for you to see this month from all my design team sisters. If you hopped over from Tess then you came from the right place, if you just happened upon this hop then please head over to My Cricut Craft Room so that you get to see all the wonderful projects and a chance at the blog candy.
  

I will have the line up at the bottom in case you get lost along the way. 


Can you believe that it is September already? WOW!!! This year is flying by. 
I have a few projects for you this month. I am just gonna jump right in and get to the pics and what I did. 


Project 1: Create a Critter.


I used the image from button 9(sorry don’t know page # my sis is borrowing the cart and I used my Gypsy)
On my Gypsy I used the accessory function key and button 9 to weld together 2 of the shapes to create a card base. The size is 4.30 by 13.77
welded base
 Then I cut the same image including the topper for the acorn at 4.30 by 7.45 

The topper of the acorn I embossed with Swiss dots and the acorn with d’vine swirls cuddle bug folders.
The critter is from the same button. He is cut at 2.92”.
I used Tim Holtz distress inks in vintage photo and antique linen to give the cuts some shading. 


After inking, I assembled all the parts.  In addition, I used a sukra white gel pen for the highlight in the eyes and white dash lines around the card.


Project 2: Sponge Bob Cartridge


I have a hard time making manly cards and when I chose to use the SpongeBob cart this month I had no idea what I was going to do with it. 

Then on PG 58, I saw the boat that SpongeBob drives. It hit me. I could cut off the wheels on the bottom and it would make the perfect boat.

I cut the image and icon layer @ 2 ¼
For the boat I, used colorbok textured white paper.
For the seats and accents, I use a pearly blue from recollections.


I found the waves on pg 47. I used different colors of blue paper and cut the waves at 2 ¼, 2 and 1 1/2 “
After assembling the boat I used paper from my mind’s eye away we go 6 X 6 pad for the background papers. I cut them so that when taped together they measured 4 by 5 ¼.
I then added some of the waves varying the colors and then then added the boat and popped more waves up on top so that it looks like the boat is racing through the water.
I added some glossy accents to the “windshield” part and used a white gel pen to add dash lines to the outer card base. 


Project 3: Kate’s ABC’s
For this project I used the cuts found on page 47 cut @3 ½


I assembled the cut and then I added stickles in hot pink and icicle to the butterflies and black puff type paint for the little bodies.
The base of my card is Kraft card stock cut @ 7 by 6 ½ and scored and folded in half.

The Yellow layer is 6 ¼ by 3 ¼
The flower paper (MME) is cut @ 6x3
I tied a pink ribbon and cut a flag shape by hand out of the yellow paper. The sentiment is from Studio G and stamped with memento cocoa brown ink.

Thanks for stopping by and checking out my projects. I hope that you have enjoyed yourself and have found some inspiration. Please hop on over to           .   I know that my design team sisters have some great projects for you to see.

Here is the entire lineup in case you get lost along the way. 


1. MCCR http://mycricutcraftroom.blogspot.com/
2. Ava http://scrapbookdesign4u.blogspot.com/
3. Jamie L http://babyjaydensmommy.blogspot.com/
4. Marji www.fstampaholic.blogspot.com
5. Jamie M http://craftygirl21.blogspot.com/
6. Janet http://janetscreativeworld.blogspot.com/
7. Ashley http://especiallymade.blogspot.com/
8. Lisa Ch http://lisacustomscrapbooking.blogspot.com/
9. Erica's Projects http://ericasprojects.blogspot.com/
10. Nanne http://nannes-creations.blogspot.com/
11. Jessica W http://www.craftinandstampin.blogspot.com/
12. Susie http://susiesscrappers.blogspot.com/
13. Mary http://Mary-fortheloveofart.blogspot.com/
14. Jodie http://jodiesscraplab.blogspot.com/
15. tess www.sassycricutcrafting.com
16. Sarah http://www.craftingwithsarah.blogspot.com/

17. Sharon http://simplysweetbysharon.blogspot.com/    NEXT!!!!!
18. Blog Candy http://ericasblogcandy.blogspot.com/


Crafty Hugs and love
Sarah


Wednesday, August 29, 2012

Great Give a way!!!!

Good evening my friends, as you may know I am on the Design Team for My Cricut craft room and  I would love for you all to have a chance at winning some of the awesome goodies she is having for a giveaway.. Cartridge,papers and more.   Pop over there and give her some love and find out what you have to do to be entered to win, and while you are there, tell here what you love about your Cricut::)

I love my Cricut. I don't know what I would do without it. I love the fact that I can make beautiful and creative cards with just a few pushes of a button( or 2). My Cricut makes me a feel like a craft ninja and I am proud to say that!!!!

Go over and see what you need to do to win!!!!

To enter all you need to do is click this link.. http://mycricutcraftroom.blogspot.com/2012/08/contests-winners-and-project.html

Thursday, July 19, 2012

Theme day Thursday, A Child's Year, with My Cricut Craftroom


 Hi Crafters! 
Today over at My Cricut Craftroom the design team is using A Child’s Year to create our projects. 

I decided to make an easel card for my project today.

Here is a peek at my project and then I will tell you what all I did.


What you need
·       Card stock cut @ 8 ½ by 4 ¼    score @ 4 ½ and 6 3/8
·       Card stock cut at 4 ¼ square  for the front of card
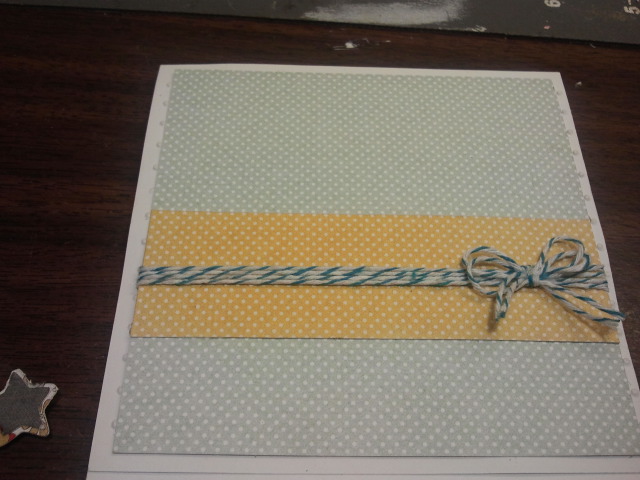
·       Blue dot paper cut at 4” square.
·       Yellow dot cut at 4 by 1 ½
·       Wrap yellow dot paper with blue twine and tie bow.


·       Cut the Fairy from pg 77 @ 3 ¾” and also cut the shadow


I assembled my easel card by folding the score lines in opposite directions, then I attached the 4 ¼ square to the flap on the base of the card.


I then used the blue and yellow papers to create the layers and wrapped them with blue twine and tied a bow.
I adhered them to the “flap” of the card.

After cutting my Fairy I assembled her and popped her up on foam tape and added her to the front of the card.

For the inside to keep the easel standing I cut a piece of yellow paper @ 4 by 1 ¼
And layered on a white cs cut @ 3 ¾ by 1
I stamped happy birthday from a stamp from TPC Studios card creating birthday. Using Memento rich cocoa ink.
I also popped that up on foam tape

I then added 3 gray rhinestones to it.

Here is a look at my completed card.


Thanks for stopping by! I hope that you will head over to My Cricut Craftroom to see what my other design team sisters have made today.

Crafty hugs and Love
Sarah
Monday, July 16, 2012

My Imagination Monday with My Cricut Craftroom


 Hi Crafters! It’s time for another My Imagineation Monday. 

I love using my Imagine and I wanted to create something new and exciting for you today.
I used My Imagine and the Ancestry cartridge along with printable vinyl to cover my laptop. 


1st I used the print feature on the imagine to print 2 12x12 pieces of the printable vinyl. 


I used the pattern on page 4 of the hand book.

My laptop measures 14 ½ x 9 ½

here is the printed vinyl

2nd I cut the 1st piece of vinyl down to 12x 9 ½
And applied it to my laptop.


*make sure to clean your laptop with a good cleaner. I used electronic wipes*

Now since my laptop was larger than my vinyl I had to “butt up” the 2 pieces of vinyl and I ended up having to overlap them by about 1” (see pix)


I love the way that it turned out, I have been wanting to personalize my computer for sometime and the other day while looking through my vinyl box I saw the printable sheets and decided to give it a try, I am so happy with the results and I didn’t have to pay $20 or more for a laptop skin.

Here is another look at before and after


Thanks for stopping by my blog today. I hope that you enjoyed my project.
Please be a dear and head over to My Cricut Craftroom and see what my fellow design team members have made.


 Crafty Hugs and Love
 Sarah


Friday, July 6, 2012

July 100 Cartridge blog hop.


Welcome to Erica's Craft Room
100 Cricut Cartridge Blog Hop Day ONE

You should have started at http://mycricutcraftroom.blogspot.com/ if not please start at the beginning
 

Welcome to My Cricut Craft Room's one year "BLOG-iversary" of our first 100 cartridge Blog hop!
A year ago the blog was kicked off with the first design team members and daily postings. It took 2 months to get ready for this hop last year. Now we bring it to you the first full weekend of every month.
Collectively the design team uses over 100 different Cricut Cartridges in their projects during the two days of this hop. Sunday the new members of the design team will be announced and some have even made a project to share with you!! What an exciting weekend!!

As special treat enjoy 10% off of your total purchase with Erica's Craft Room Store.
Use the code JULY to see 10% off of your total purchase (No exclusions)
on July 7 & 8. Also on Sunday there will be an exciting announcement!!!


Hi Crafters! Thanks for hopping along with us this month. There are some very talented ladies for you to visit today.  Right now I am out of town sitting on the Outer Banks of NC and Having a wonderful time.  I’ve been having internet problems today so hopefully this will post.  Please enjoy the hop and Remember to visit Erica’s store and use the great discount above. 


This month I chose to use Paisley, car decals and cricut birthday cakes cartridge.


1st up Paisley

I found these cute note cards at the goodwill and I thought for 50cent I could redo them and make them into my own creation.  Here is the pic and then I will tell you what I did.


The note cards measure 6 by 3 ¾  


Paisley cartridge pg 36 cut at 2.3 on my Imagine and filled with colors and patterns from the elise cartridge.
The top note shape is from the stock imagine images cut@ 2.7 and the pattern is also from Elise.

The striped paper is from enjoy the season cartridge. 

I used foam tape to give some dimension. 

The stamp is from pink by design and the ribbon is from American crafts.


2nd  Car decals
I used the car decals to cut a 4x4 vinyl for my suv.
 I used the lime green and pink( my favs) to layer it up. I cut it at 2 “ 

I used the “kiss” cut method. I set my pressure @ 2 blade @ 6 and speed @ 3 and it works out great. 


3rd Birthday cakes
Pg 64 cut @ 2” 


Papers are from my mind’s eye fine and dandy girls and lost and found market street 6X6 pads.


I stamped it with a ditto stamp all over the background and embossed with clear embossing powder.
The white strip is cut at 5 ½ X2 and embossed it with the swiss dots cuttle bug folder.
The Stamp is studio g with memento ink.
I added crystal stickles to add to the tops of Cupcakes.


Thanks for stopping by my blog. Here is the entire line up in case you get lost along the way. Next you should hop over to Mary http://Mary-fortheloveofart.blogspot.com


If you get lost along the way here is the entire line up


Crafty Hugs 
Sarah


Monday, July 2, 2012

Letter A


Hi Friends! This is a quick post today because I am getting ready for vacation. Today is the letter of the day over at My Cricut Craft room.
I used Kates Kitchen to create my card.
I cut the apron at 4 inches.
The papers are from a 6 by 6 my minds eye stack but I cant think of the name just now.
I am sorry that this post seems scattered and short but I am so busy and have so much on my mind.
Please see what my other dt sister created over at My Cricut Craft Room.