Tuesday, January 29, 2013

Post it note holder with gel pen


Our Kreative Karma

Hi Crafty Friends!
 Today is my first post as a Our Kreative Karma Design team Member. I am super excited about being part of a team with such Creative ladies that I love. If you haven’t check out the design team blog please head over there (of course after you check out my project lol), follow, and see what we are all about.

For This month it was all about our hobbies and since my is paper crafting and using my cricut, well I just could not resist making something out of paper. I decided to make a cute little post it note holder with gel pen. These make great gifts and are wonderful to have in your purse or in the car.

So here is what I did.

For the main part of the holder you will need a piece of cardstock that measures 7 ½ by 3 ¼
Score that cs at 3 ½ 3 7/8 and 4 ¼ .
Now fold all the score lines.
Next we make a cut between the 2 score line at ¾” and 1 1/8” on both sides of the base layer.
Now we are going to fold the score lines. Fold the 2 outer lines Mountain style and the center line in a valley fold. So that it looks like an M if you look at it from the side.
Now pop out the cuts that you made these are for the pen.
I like to use ½ a stack of post it notes. I add score tape to the back of them and place them on the larger section of the base.
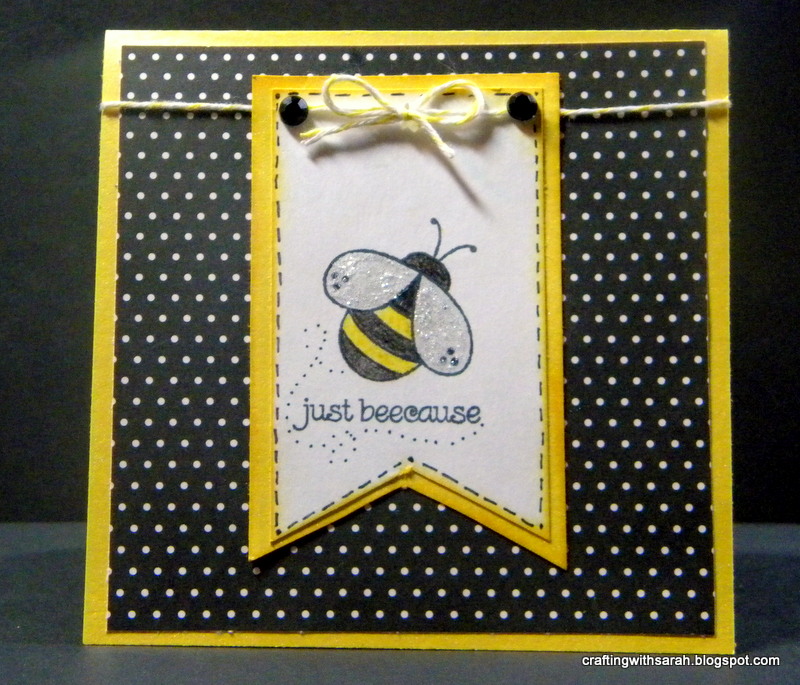
For this card I decided to use a cherry them. I just love the look of black, red and white with Cherries. It feels “retro” to me.
For the front of the card, I added some black and white polka dot paper.


The Cherries are from the Preserves cartridge cut at 2 ½”


I added some glossy accents to the cherries to make them seem more real.
 Then after the glossy accents dried I added some rhinestones for a little bling. 


I glued the Cherries stight to the base so that there would be nothing to snag on. Then added the mini gel pen. I found these at the dollar store for a pack of 4. 


 Here is my finished post it note holder. 

Thanks for stopping by my blog  and I hope that you will go over to the Our Kreative Karma blog and follow us. We have a lot of exciting things coming your way and you wouldn't want to miss out. 

Crafty Hugs!
Sarah


Monday, January 28, 2013

weekend recap and card


Hello Crafty Friends!
I hope you are all doing well today and that you all had a great weekend.

 My weekend was filled with highs and lows.

The Highs were
My hubby, my mom and I took my 5 year old Nephew Jordan to Chucky Cheese, and we had a wonderful time.
I got a new book called Organize now at Barnes and Noble
The lows:
ok! so when I am not feeling well I lay on the bed and watch videos on my laptop. I have a black raised stand that holds my computer, mouse and until Saturday, I would set my drink on there as well. I figure you have all guessed it by now but my rambunctious Chihuahua  Cooper
The drink spilling culprit Cooper
 Jumped on to the bed wanting to play and spilled half a can of soda on my laptop. I was so upset. Not really at him but at my self. I know better than to have drink near my laptop. I tried to dry up the spill, popped all the keys off my laptop and I thought that I had got it up in time. Well I guess I hadn’t. My laptop started beeping and acting crazy so I took the battery out and my hubby used the shop vac to try and dry it out, still nothing. So I looked online and most said to lay it upside down for at least a day. I was so upset and I couldn’t stop crying. I thought I had lost everything. I had no idea how I was going to replace my computer. I just had no idea what I was going to do.  Hubby dug out the old dinosaur laptop from the closet( I mean that computer had not been turned on in 3 years and it weighs about 10lbs) but I used it. Not happy about it but I did get to get online with it. 


Now on to the good part of my low!!! Today I decided that I would try to turn on my computer and Guess What?!? It works, well partly (having to use the enter key on the number pad) I am so super happy. I didn’t lose everything and all I am going to have to do is replace the keyboard. So YAY!!!!!


Ok so  now that I have typed you to death I wanted to share a cute little card that I made.


(click link above to order. when you spend $35, you can order a cute little valentine kit for just $10  Pic of the kit at the end of post)
The card is 4 by 4 with layers cut ¼” smaller.
I stamped with Memoto tuxedo black and colored in with my American Crafts colored pencils.
I used some washi tape instead of twine to go under the stamped piece. 
Then I added some rhinestones to the corners. 
Super cute card just to send to a friend to say Hello or thanks!

Thanks for stopping by, Make sure you come back tomorrow for my 1st post as a Kreative Karma Design team girl. I have something cute to share with you.

Crafty HugsJ
Sarah
December 2012 Constant Campaign: National Papercrafting Month: Whooo’s Your Valentine?This is the cute little kit that you can get for 10 when you order $35 or more, The kit includes  12 die-cut boxes, 3 cardstock sheets, 1 sheet of silver glitter paper, 12 treat tubes, and an exclusive D-size stamp set created specifically for the kit! 


Link in sidebar for my Close to my Heart store or click here

Friday, January 25, 2013

Just BEEcause

Hi Crafty Friends!

I hope you all have been having a fabulous week. My week has been wonderful but I am so looking forward to the weekend, 

I have a cute little card for your viewing pleasure today.
For this cutie I used the Stamp set Pun Fun from close to my heart for the bee and the sentiment. 
(Link to my store above and in side bar)

I colored it using my American Crafts colored pencils. 

The card base is 4 by 4 and I used a shimmer Yellow paper from recollections. 
The polka dot is 3 3/4 square. 
and the flag shape is 3 x 2 1/2. To get the cuts to line up at the bottom I cut the flag shape on both pieces at the same time. By having them line up at the bottom, Then after cutting the boarder amount was the same all around. 

Ok so after the cutting the flag I did some black dash line and a flight path for the bee. I then ran some twine around the card and through the flag shape. I tied a little bow and added some black rhinestones and stickles to the wings. 


Thanks for stopping by! I hope you all have a great weekend and get your craft on! I will be back on Monday with another project for you. Until then Happy Crafting!

Saturday, January 19, 2013

Winter in the Air Blog Hop

Looking for the Anything goes blog hop Click Here


Oh the weather outside is frightful, but these projects are so delightful.
Welcome to the ‘Winter’s In The Air’ blog hop.

We have all made projects to warm your heart, and potentially decorate your home, during these snowy months.

You should have came from  Elecia. If you just happened to run across this hop you will want to start at Melanie  to see all the wonderful projects. 

Here is my project that I made.

 I received this cute little guy from a cut swap and just had to use him. I dressed him up a little more and love the way he turned out. 


For the card I used a standard a2 sized card  and added a white cardstock layer that I embossed with the swiss dots cuttlebug folder, I then inked the dots with weathered wood distressing ink.

The blue paper measures around 2 ½” by 3 ½” I just adhered it straight down to the white card stock.
The snowflake paper is 2” by 3 ½” I sprayed it with homemade shimmer spray and with a blue mist.  After allowing it to dry I inked the edges and rounded the corners.

I then used White daisy ink from Close to my heart and Winter punny stamp from My Pink Stamper.


After I let that dry for a long time( because of the white ink) I popped up the snowman on foam tape.and placed him crooked, I think he looks like he is making a snow angel. How funny would that be. hehehe


Here's another look at my card. 


If you comment on everyone’s post you will be entered to win this from Melanie.

 It includes paper, stickers, metal embellies, adhesive, mists, stencils, a journal and more. Be sure to check back on Tuesday, Jan 22 to see who won.


Here is the line up for today.
Melanie http://afternoonscrapper.blogspot.com/
 Claire http://threewaterscreations.blogspot.com/
 Elecia http://creationsby-kahaulani.blogspot.com/
Sarah www.craftingwithsarah.blogspot.com  (You are Here)
Nancy http://alwaysastorycreationsbynancy.blogspot.com/ (NEXT)
Anita http://scrappyhappymommy.blogspot.ca
Ashley http://marinewifesscrappinlife.blogspot.com
Miranda http://www.nanasscrapspot.com/
Michele http://michelescraftroom.blogspot.com/
Teresa http://freshandrenewed.blogspot.com/
Robin http://cutonedesignsbyrobin.blogspot.com/
 Lucy http://love2createitall.com
Christine http://hotberrydesigns.blogspot.com/
Charity http://thebookinroom.blogspot.com
Lluvia http://sweetbirdmemories.blogspot.com


Have a great weekend and thanks for hopping with us.

Friday, January 18, 2013

AnyThing Goes blog hop


Welcome to the Anything Goes Blog Hop!!
We are pleased to have you here. We hope you enjoy seeing all the fabulous projects on each blog in this hop. 
We are giving you 2 days to hop. We all know how busy lives can be:)

Shelley the host of this hop has a great blog candy package for 1 lucky winner! All you have to do is comment and be a follower on each blog in this little hop! 

You should have started at Shelley's blog. If you didn't please go to the beginning. We don't want you to miss a single great project in this line up. 
Right now you are (here Sarah) and your next stop should be (Cathy'sblog.

I will provide the full line up at the end of this post in case you have gotten lost along the way. 


I am super excited that you have decided to stop by my blog.
For this hop I decided to make a little treat bag for my hubby.
I have always wanted to make the nugget wrapped treats but never saw a reason to, but with Valentine’s Day coming up I thought I would.


For the wrappers I used white card stock cut at 1” by 2 5/8”

I then used the  Whoo's your valentine stamp set from Close to my Heart and stamped it with Memento Lady bug red ink. I then attached them with atg tape.


For the bag I used a Recollection Transparent Archival bags and cut a few inches off of it.
Here is what they look like

Next I made the topper for the bag. I cut the red cardstock at 5” by 4 in. I scored and folded it over the bag and stapled in the center.
The paper is from the Recollections All seasons paper stack. I cut 2 at 1 ¾ by 4 ¾.


Then I used a stamp from the Whoo’s your valentine stamp set.
I then punched a small silver heart from glitter paper from the same set.

 Oh and I added a little bit of red twine and tied a bow. 


That’s it. Super simple, easy peasy little treat.


 Now here is the blog candy, Please make sure that you follow and comment on all the blogs so that you can have a chance to win. Open to us only. Shelley ships to the US only.

Complete line upJ


Monday, January 14, 2013

"Punch art Animal" Lamb baby card


Hi Crafters! This week we were to create animals from shapes. I chose to create a cute little lamb using the Artiste and Art Philosophy cartridge. 

Here's my card, then I will tell you all about it. 
For the Lamb(sheep) I used the following cuts.

From Art Philosophy I cut the Scallop and the legs. The scallop is found on page 31 and I cut it at 2 1/1" on real dial size. The legs are cut from page 39 at 1" rds. 

From Artiste I cut the "face" shape from page 76 @ 1/2" real dial size. Would you ever guess that it is really an owl. Cool huh?


For the body I used d'vine swirls embossing folder and some chocolate ink from close to my heart. 
I then attached the "legs" to the body. 
For the face I just added some googly eyes and drew in ears and mouth with a white gel pen and then added pink chalk. 


The card base is note card size 4 by 5 1/2"
I used patterned cardstock from boys nursery stack. The Green is from my stash. 

I cut the green cs @ 3 3/4 by 5 1/4

The purple is cut at 3 1/2 by about 2 1/2


I then cut the word paper @ 2" by 3 3/4 
I then used my Martha Stewart doily lace punch and punch the boarded in green and the purple dot paper. and add 1/4 white strips of cs to cover the edges. 

I used foam tape to pop up the lamb; then stamped congratulations in chocolate ink from Close to my heart. 
Here is another peek at my card. 

Thanks for stopping by! Please see what others have made by heading over to My Cricut Craft Room. 


Crafty hugs 
Sarah